PaintFinity Beta
Drawer-first paint bottle racks. Enter your drawer, pick your bottles, mix sizes row by row, and download a 3MF to print.
New here? The Welcome and How it works tabs explain the three steps. Then work through Drawer, Bottles and Print. Everything updates live in the preview.
Yes, this fits. Here is what to print.
Paint storage sized to your drawer, your paints, and your printer.
No CAD work. No slicer-scaling hacks. Enter your drawer dimensions, choose your paints and printer, then download a ready-to-slice 3MF designed around your setup.
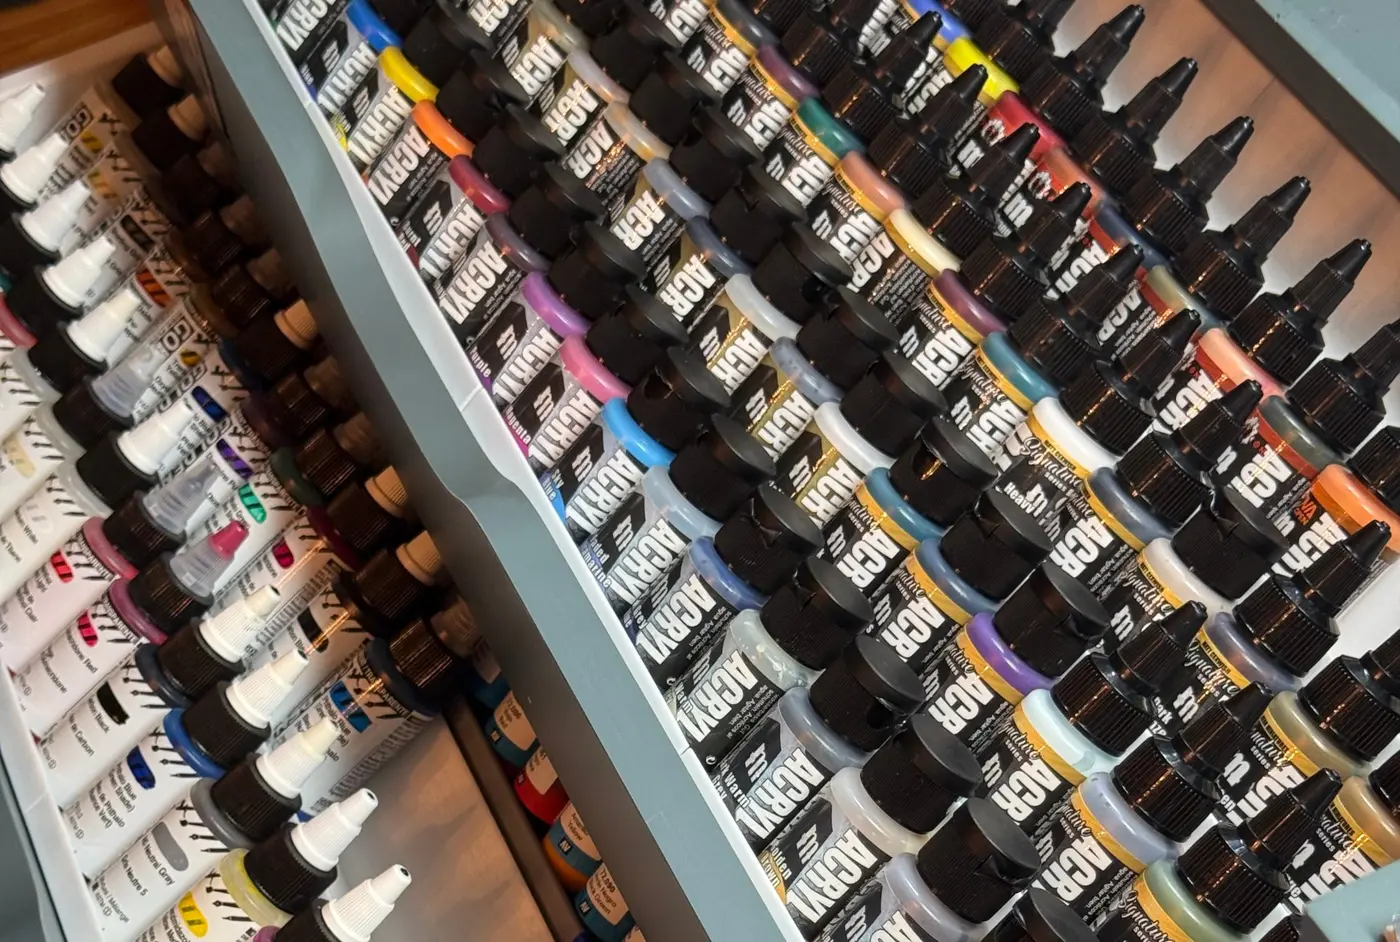
Enter the internal width, depth, and usable height of your drawer.
Choose your paints, row layout, printer, and available options.
Generate a multi-part 3MF ready to open in your slicer.
Built from MakerWorld feedback
I started by publishing paint-storage models on MakerWorld. The models worked, but the comments and requests revealed a larger problem. People had different drawers, different printers, and collections containing several paint brands. A single fixed model could never cover every combination.
Those comments helped shape PaintFinity's foundation and features. Instead of publishing another separate model for every possible setup, I built a parametric system that generates storage around the user's actual drawer, paints, and printer.
Garry
PaintFinity is free to use.
How it works
Enter the internal width, depth, and usable height of your drawer, or pick an IKEA ALEX preset as one example.
Choose your paints, row layout, printer, and available options.
Generate a multi-part 3MF ready to open in your slicer. Print at 100%, never scaled.
The fit problem
Standard printable racks assume every IKEA ALEX drawer, workbench, or cabinet has identical usable dimensions. They do not. PaintFinity calculates the layout around the measurements you provide, so the rack fits the available width, depth, and height without relying on slicer scaling.
The mixed-bottle reality
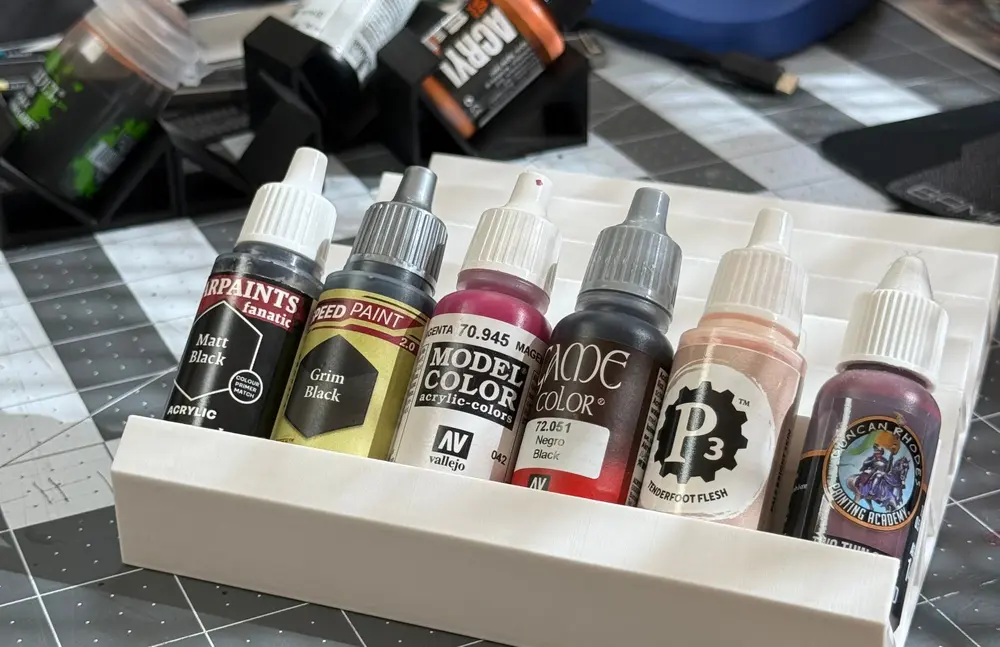
Miniature painters rarely use only one paint brand. PaintFinity supports layouts built around different bottle families, including mixed collections of pots and dropper bottles.
The printer problem
A rack that fits the drawer may still be too large for the printer. PaintFinity accounts for the selected printer's build area and divides larger layouts into printable sections with integrated joins and alignment features.
The details
1. Smart Nesting & Multi-Layer Stacking
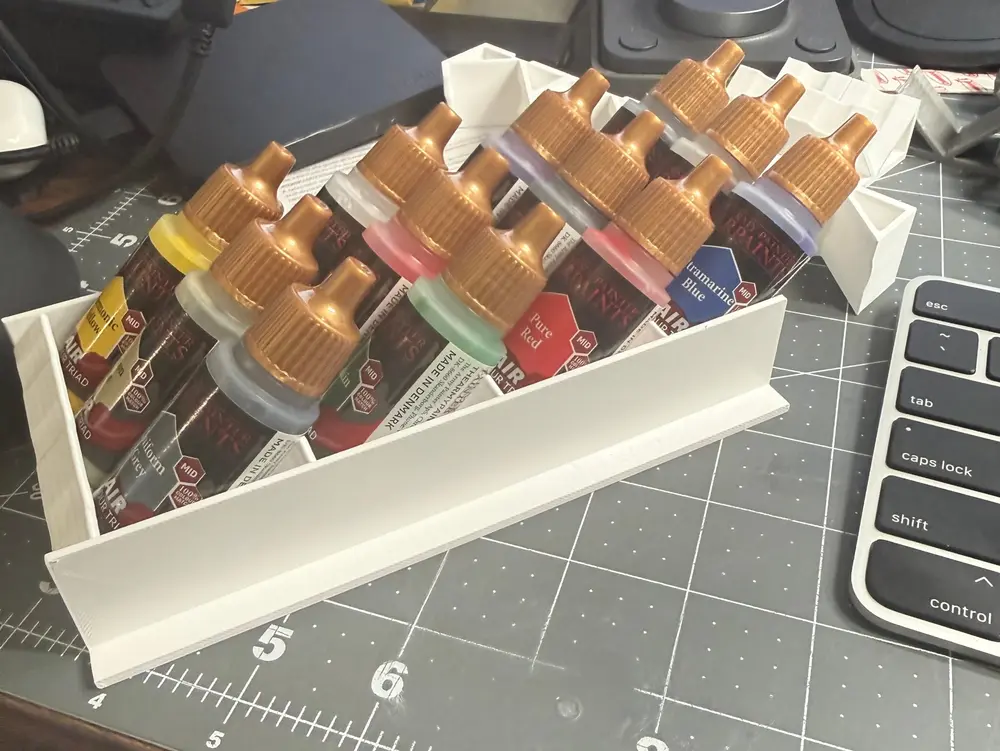
- Calculated Nesting Angles: Each bottle size gets a calculated tilt angle based on its overall height and your drawer’s usable height.
- Space Efficiency: Staggered angles allow rows to nest tightly front-to-back without wasted space.
- Layer Configurations: Selecting Two layers splits usable drawer height in half (minus the deck plate), resting bottles at a shallower angle to fit deep drawers or taller paints.
2. Print-Optimized Geometry
- Slicer Snapping: Wall thickness, base height, and recesses automatically round to whole nozzle extrusion lines and layer heights to eliminate floating slicer artifacts.
- Slot Sizing: Slot widths match your bottle diameter, with a minimum floor width of 25 mm.
- Contoured Bearing Plate: Each slot features a shallow dish tapering from standard wall thickness at the center up to wall + recess depth (2.0 mm default) at the edges for stable bottle seating.
3. Interlocking Assembly & Seams
- Row-to-Row Dovetails: Rows lock front-to-back using a rear dovetail rail that slides horizontally into the next row’s front groove.
- Drop-Down Part Seams: Wide rows split into equal, whole-slot parts. Part A (left) features a 4 mm alignment tab, while Part B (right) uses a blind notch that drops straight down onto the tab.
- Z-Lock Key: An optional loose dovetail key slides into the first row’s front groove to span each seam to keep parts level.
- Rear Lock Bar: An optional loose bar slides onto the rear rail behind the last row and spans each seam.
4. Drawer Layout & Dead Space Rules
- Dead Space & Fillers: Side to side, leftover width becomes L-shaped pads, or is merged into the end piece. With Spread on, the leftover is shared as gaps between bottles instead, up to 3 mm per slot, and any remainder still follows the padding choice. Front to back, anything behind the last row becomes an open-top Spacer box up to the rear lip height.
- Mixing Bottle Sizes: Each row holds one bottle size. To mix sizes in a single row, build separate modules and place them side by side, left to right or right to left. Rows of different sizes can still be stacked front to back, and Padding keeps them flush.
Beta. The seam, pad and dovetail joints, the Z-lock key and the rear lock bar are printed and fitted on a Bambu X1C in PETG. The key and bar are tested but not final. Other printers and materials are starting points, so print the test bundle first. Two layers (the hangers and the rear spacer groove) are still in testing.
💡 Measurement Tip: Presets marked estimated use a guessed cap size. Check yours before you export.
Test print: check one bottle size before the whole drawer
Print one small test bundle for a single bottle size. Check how the bottle sits and how the joints slide before you commit to a full drawer.
⚠️ Do Not Scale in Slicer: Scaling a 3MF distorts wall thickness, dovetail tolerances and total height. Print at 100%.
Drawer
Step 1 of 3. Measure the inside of your drawer, or pick a preset.
- Stock Slides: Standard ALEX slides leave ~10–12 cm hidden under the desk overhang. PaintFinity keeps active paint rows forward and allocates overhang depth to the rear Spacer box.
- Full Extension Mod: Running a full-extension mod (like RadicalReel's IKEA ALEX Full Extension Drawer Mod)? Tick “My drawer has full-extension slides” below to fill the whole depth with active paint rows.
💡 Measure Your Exact Box: IKEA drawers can vary by 2–4 mm across production batches, regions, and humidity. Measure your actual interior floor width rather than relying solely on nominal product specs.
Caution: Minimal headroom (< 2 mm) may make it difficult to grab and lift bottles out of shallow drawers.
How to measure your drawer
Fractions work in inches, for example 23 5/8. Measure inside the drawer box, and use the height from the shelf or drawer floor to the underside of whatever sits above it (a drawer lid, the next shelf). Headroom is the clearance you want left above the tallest part of the rack, so caps and hands clear it. Drawers differ between models and years.
Advanced Drawer Settings
Bottles, front to back
Step 2 of 3. Pick a bottle for each row and how many rows it gets.
Lower layer bottles
Upper layer bottles
Advanced Cradle & Slot Geometry
Printer
Step 3 of 3. Choose your printer, then download the 3MF.
About these settings
Standing on end prints each rack with its length pointing up, so the build height sets how long a part can be instead of the bed size, and every layer is the exact cross-section. The dovetail, valley and recess print with no overhangs and the joints fit much more cleanly. The part is as tall as it is wide, so it has to fit under the printer's height limit, and a brim helps. Flat prints the rack lying as it sits in the drawer. The 3D preview always shows the installed position.
Parts and blocks. Rows nest flush and print as one body in blocks of the number set above (4 by default). A dovetail joins each block to the next, front to back. Dovetails need walls about 9 mm tall or more, so they are skipped at steep angles. A block has to fit the bed, so tall stacks split into more blocks. Rows longer than the maximum part length split into equal parts of whole slots.
Tune the joints for your own printer. Start from these dovetail clearances per side:
- PETG: 0.05 mm per side (the setting that fitted on a Bambu X1C with the 0.28 mm Extra Draft profile).
- PLA: 0.1 mm per side.
- ABS / ASA: 0.05 mm per side. The Material setting fills this in for you.
How tight it fits still depends on your printer, filament and slicer settings. How tight they fit depends on your printer, filament and slicer settings. The test prints so far were on a Bambu X1C with the 0.28 mm Extra Draft profile. In PETG, 0.05 mm clearance per side gave a good fit on the seam tab; in PLA, 0.1 mm fit the dovetail. Print the test bundle for your bottle, push them together, check the fit, then change Dovetail clearance per side in Advanced settings before you print a full drawer.
Advanced Print & Joint Engineering
Assembly and joining
Parts join at seams with a tab and notch. The dovetail joins one block to the next, front to back. The key is optional and slides in before the pads go on.
Result
Download
3D preview
Drag to orbit, scroll or pinch to zoom, right-drag to pan. It draws the same geometry the 3MF contains.